
(created November 3, 2015, updated April 7, 2017 and January 13, 2020)
Some say that Eagle Pose is the most challenging posture in the Bikram series because most people with large arms and legs have a terrible time twisting their arms and legs "like wet, juicy ropes." Others get frustrated because they find themselves in awkward situations when they try to balance on one leg. Everyone has good and bad poses, but somehow Eagle gets placed on most people's bad or hated list.
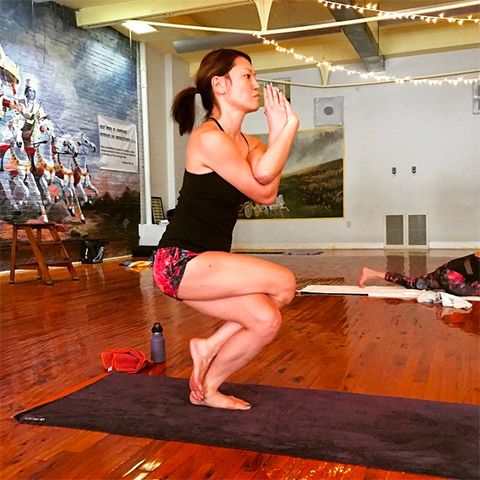
My own weakness in this pose is I tend to start collapsing as soon as I get every detail in place: the hands perfectly together in prayer, the legs perfectly twisted with my foot hooked behind my other leg's calf muscle, my upper body back, my pelvis turned back and up, my stomach sucked in, and my feet, knees, elbows, and hands in one vertical line below my nose. It takes a lot of strength and determination to hold it all together. If you can do all that, that's already a good pose that I'll call Phase 1.
To go forward into Phase 2, assuming you have enough energy in your reserves, you have to sit down more so your topmost thigh is parallel to the floor and you have to start sliding the hooked foot down towards the heel of the standing leg. Don't collapse! Now pull your elbows down towards the ground some more so the tops of your fingers (if they were in prayer) come below your nose. At this point, it will be rather tough to lean or even arch your upper body back, bodyweight more in the heel of the standing foot, but you will do it and you might be huffing and puffing at this point, so I'm going to give you a trick - a cheat - that you can do to help you. I call it the "Phoenix Breath." Instead of breathing through your nose, because at this point you will feel as if you don't have enough air going in and out of your lungs, you will open your mouth like a small "O" and inhale and exhale slowly but surely through your mouth hitting your thumbs with your breath. Focus your gaze in the mirror. Chin up, look directly at your own eyes. Once you can do all of that, that's a very good pose that I'll call Phase 2.
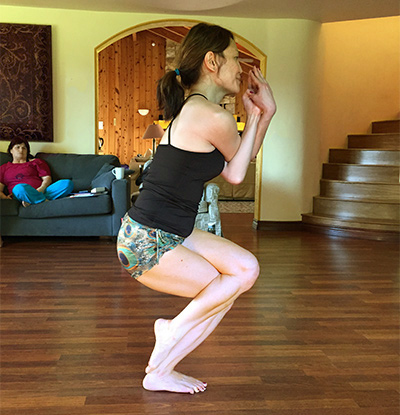
To get to Phase 3, you will need to muster up all the energy reserves you have because you will need to slide that back foot down so much that the toe touches the little scoop where the fibula and heel meet. You will see this in the second picture to the right. To make this even better, you will need to lean or arch your upper body back some more so the back heel is perpendicular to the floor. I almost have it in the second picture. Not quite, but almost. At this point, everything will start to loosen or collapse as you try to hold everything in place. Your hands will start coming apart, so you will need to glue them back together. You will find your knees twisting in one direction, so you will need to counter the twist. Remain calm as you do so. You will need to plant your foot of the standing leg - root it like a tree - so firmly into the ground using the three-point stance - weight distributed across the pinky, big toe, and heel - that you can lean your upper body back, still arching your back, chest up, head back, bodyweight more in the heel, at least 60%, pretend that there's a string pulling you up from your head like a marionette puppet as you sit down more, still sucking your belly in, lowering your center of gravity, top thigh parallel to the floor, and still holding your hands firmly in prayer with your fingertips just below your nose. When you can do all of that without doing the Phoenix Breath, staring at your eyes in the mirror, and holding the pose still for ten honest seconds, then that's a great pose that I'll call Phase 3.
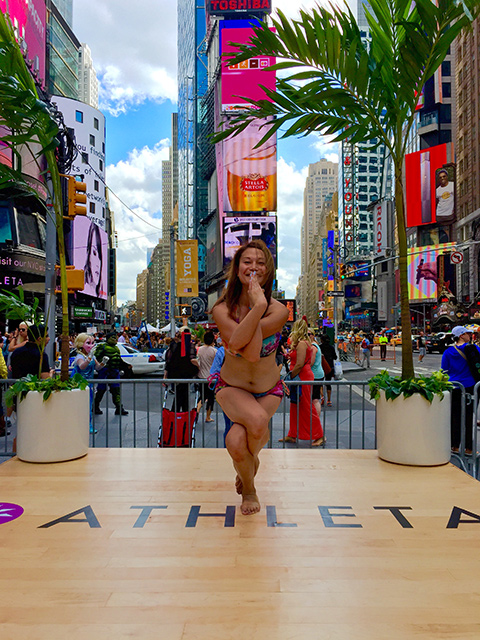
To go further, relax your face, spread your arms out (Phoenix Phase 1) and then up to get your hands in pistol grip. Inhale and stretch up and try to touch the heavens (Phoenix Phase 2). Drop your head back and arch your upper body back for a backbend. This is similar to a Half Moon Backbend but balancing on one leg (Phoenix Phase 3). Find that place within you that enables you to feel stronger yet lighter in each phase of the pose. You practice the pose to honor your Self. Moving from one phase to the next makes your pose a little better and a little stronger. That is the Phoenix version of Eagle that I will call Phase 4.
What might a Phase 5 look like? Perhaps moving into a One-Legged Wheel. Use extreme caution with this one and my advice is don't even try it unless you're ready. USA Yoga told me that Eagle was too easy a pose for the championship, but I don't think they've ever seen Eagle to Phoenix or Eagle to Phoenix to One-Legged Wheel.
The mistakes I see when I'm teaching this pose are:
- your feet, knees, elbows, and hands are not in one vertical line below your nose
- you don't make a conscientious effort to try to get your hands together or pull your elbows down
- your thumbs aren't towards your face and your pinkies aren't towards the mirror making your hands tilt at an angle
- you don't suck your stomach in
- you don't sit down low enough
- you think "chest up" means to lift yourself up when you should really be sitting down more
- you lean forward too much so your upper body is almost at a 45 degree angle from the floor
- you give up too easily
|
|
|

