
(updated December 22, 2015)
Without a doubt, Triangle Pose is one of the most difficult, gut-wrenching poses in the Bikram series because it exercises every muscle, joint, and fiber in your body. Triangle increases the strength and flexibility of your hips, tones the muscles on the sides of your torso, and forces your heart and lungs to work together "like an arranged marriage in India," as Bikram says.
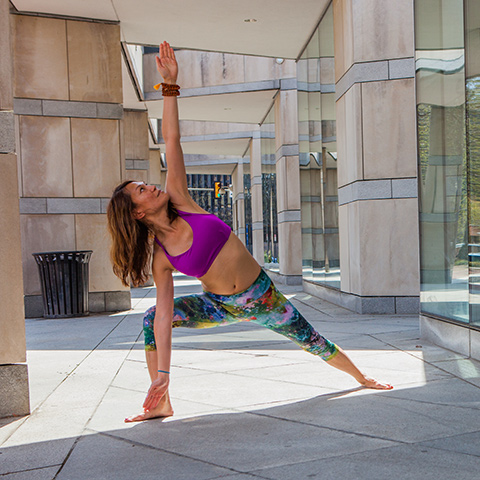
Some people perform an Iyengar Triangle Pose in my Bikram classes and I have to quickly correct them because Bikram's Triangle looks different, although it still hits many of the same major areas. To get into the pose, you start with your feet together and arms up over your head. In one movement, step your right foot out to the right, at least four feet (a larger step than in the previous pose, Standing Separate Leg Stretching) with your arms parallel to the floor, palms facing down. Your two heels are in one line. Pivot your right foot 90 degrees clockwise, bend the right knee, and sit down low enough so that your right thigh is parallel to the floor and your thigh and shin are at right angles (hence, the "upside down L like in Linda, not like a Z like in Zebra" dialog). Adjust your right foot if needed. All of your weight should be on the bent leg. Keep you spine straight. Your head should be centered over the middle of your pelvis in a straight line down from your head to your coccyx. Stretch your spine up to the ceiling to keep it straight. Push your hips a little bit forward, upper body back, arms back. Focus on your eyes in the mirror. Smile to relax your face and prepare yourself for what comes next.
Turn your palms forward so you can see them in the mirror. Windmill your arms as if they were one solid unit and touch your right elbow to your right knee. Stretch your left arm up keeping all five fingers together. Turn your head skyward and focus on your thumb. Stretch up and try to touch the ceiling, chin touching the shoulder. Stretch down and reach for the space between your big toe and your ankle. It's okay to look down momentarily to see where your fingertips are, but don't look down for too long, otherwise you may experience dizziness and imbalance. Do not lean any bodyweight on your right elbow. Your elbow is just barely touching (or grazing) your right knee. Don't let the elbow sink below the knee. The line from your left armpit to your left ankle should be straight. From left armpit to left ankle to right heel is the big triangle.
With all your might, contrinuously stretch your left arm up towards the ceiling and try to touch the ceiling. Simultaneously stretch your right arm down towards the ground and try to touch the space between your big toe and second toe (but never quite touching it). Keep both wrists straight. Keep the right leg at a 90 degree angle. Keep the left foot flat on the floor and your left leg straight with its knee locked. You have no knee! What this means is you must tighten the muscles surrounding your knee to keep the leg straight. If you do this correctly, the second triangle, a long thin one, will be formed between the point where your right elbow touches your right knee, the middle finger almost touching the space between the big toe and second toe, and the right heel. The third triangle, a small fat one, is formed by the space created under your right arm, right torso, and right thigh.
Once your have the triangles formed, your next goal is proper alignment. Imagine that you are positioned in between two narrow panes of glass that are closing in on you from the front and backsides. From the side, your entire body should be no wider than the length of your right foot. What would you do to make the adjustment? You would, as the Bikram dialog says, bring your left hip forward and right knee back with the help of your right elbow to open up your right hip. Oh, no, now your nose is about to be smushed in between the panes, so what do you do? You slowly, carefully turn your head so your nose points skyward and your chin rests on your shoulder. Now for the "killer finish"... turn and twist your upper body backwards, turning your heart to face the sky. The Bikram dialog even says that the profile of your face should be visible in the mirror. How do we get to see the profiles of our faces? By turning our mats around so they are parallel to the mirrors we are facing! If there's enough room in the studio, some teachers will tell their students to turn their mats from a vertical to a horizontal position.
The important thing to remember in Triangle is to slowly but surely breathe through the pose as your heart is pounding out of your chest. If you don't consciously breathe throughout the pose, it will feel hellish and you will collapse. I recommend smiling while you're looking skyward because it relaxes your facial muscles and calms your nerves. This is tough stuff, so anything that you can do to give you a psychological edge will help get you through this. Now repeat this for the left side and do another set. If you can get through all four Triangle Poses without collapsing, you are one tough cookie!
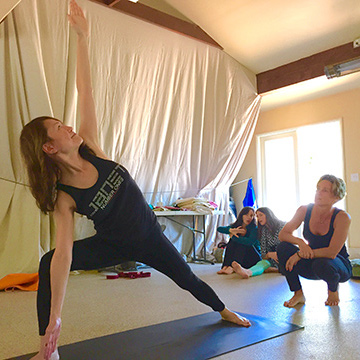
The mistakes I see when I'm teaching this pose are:
- insistence on doing the Iyengar Triangle (don't do it in a Bikram class!)
- your arm extending skyward is too far back or too far forward (I often place my hand above a student's hand to show where she should aim her hand)
- your leg that's supposed to look like an upside down L looks more like a Z
- you put weight on your knee with your elbow
- you put weight on your fingertips touching the floor
- your elbow sinks below the knee
- your elbow is too high above the knee
- your wrists are bent at too much of an angle
- your unbent leg is collapsing
- you unconsciously do an Iyengar Triangle even though you don't mean to
- your butt jutts out too much
- your fingers aren't together
- you don't suck your stomach in
- you don't sit down low enough
- you give up too easily
|
|
|

