


Over the years, I've developed a refined palate from my experiences in dining at hundreds of fine restaurants with so many fine gentlemen who not only enjoy good food, but the pleasure of my company. None of my recipes are necessarily family ones. In fact, I like taking existing recipes and making them my own. When a recipe calls for a certain ingredient, I may subsititute something else in its place to make it better. Agave nectar in place of sugar or honey. Beef and pork instead of just beef. I do not believe in secret recipes because a recipe can always be improved. A 100-year old recipe may seem timeless to some, but, to me, you're just making food that was enjoyable 100 years ago by the people and their palates at that time. The modern chef combines ingredients and methods in her cooking to make something that transcends tradition. Clare's "Meatyballs" Back in September 2011, I made my delicious beef meatballs for my friends and family to enjoy. Being the foodie I am, I've discovered new ways of making familiar things taste better. One is through simmering. I used to bake my meatballs before throwing them into my spaghetti sauce and they were nice and soft, but not as soft as I'd like them. My experiences with Village Whiskey burgers taught me that adding pork to beef can make a burger taste extraordinary. Couple that with a slow cook process to allow sauces and juices to marinate and break down the meat and there you have version two of my meatball recipe, which is based on the meatball recipe here. 1 pound 80/20 ground beef 1. Remove the outer casing of the sausages. Chef Mario Battali says on his cooking show, Molto Mario, that meatballs can contain up to 40% filler. "American meatballs were ruined by an overabundance of wealth. In Italy, meatballs were invented to make meat stretch further when times were tough. Cheaper ingredients like eggs and bread were added as fillers," he said. That makes it sound more like a meatloaf rather than a meatball. I would rather eat a meatball that has mostly meat than bread. I've made many different variations of my meatyballs, some with more pork than beef. One of my tastier creations was a pork sausage, red pepper, and eggplant meatyball that used 1 pound of sweet Italian sausage, 6 ounces of minced red bell pepper, and 6 ounces of minced eggplant, but it required three pieces of bread to bind together because the vegetables made the mixture very wet. Note: Trader Joe's Lamb Koftas with Masala Sauce for $4.99 is a very nice and quick Middle Eastern variant for those of you who don't have the time to make your own meatballs. You get 12 meatballs, enough for two to three sandwiches. However, Trader Joe's Italian style meatballs, also $4.99 for 12 meatballs, seems to pale by comparison to my homemade meatyballs. My kids and I tried them and we tried to like them, but didn't. They taste exactly like the kinds of blah meatballs you would get from a fast food cart that sells hot dogs and cheesesteaks. Created October 2011. Revised June 2014 and February 2016. Clare's "Colossal Crabbycake" Everyone has their personal favorite crabcake recipe or restaurant, but very few people have experienced what I am about to describe as the best frickin' crabcake of all time. I started with the best crabmeat out there, colossal lump. Some people say that such meat shouldn't be used in crabcakes and instead should be savored in individual bites. Bullshit. Every food item was meant to be used in different recipes to make something good taste better. Each crabbycake is going to cost you about $11 in crabmeat, but it's worth it. 6 ounces of colossal lump crab 1. Place all ingredients in a small mixing bowl. Created May 2013.
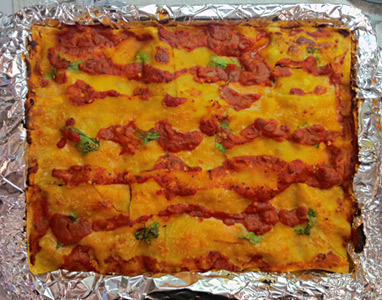
"This is really good, better than any restaurant lasagna I've had. You should've made this 20 years ago," my ex said. Of course, 20 years ago I had a more limited knowledge of food. I wouldn't have been able to make food the way I make it today. When I was younger, I followed recipes to the letter. I didn't have an instinct for cooking. I developed my ability to cook through my appreciation for fine food over the years. Created May 2011. Clare's Seafood Lasagna Incredible is how I would describe my sixteen-layer seafood lasagna. That's right... sixteen layers... four pasta and twelve of everything else. I used a one pound box of Barilla Lasagna (sixteen of the twenty sheets), a 28 ounce can of Cento Chef's Cut Tomatoes with Basil, a 12 ounce can of Rosa Tomato Paste, one pound of pre-cooked peeled and deveined shrimp, 8 ounces of pre-cooked imitation crab or lobster, 2 to 3 ounces of baby spinach leaves, 12 ounces ricottta cheese, 4 ounces of shredded Italian six-cheese blend, 4 ounces of shredded mozzarella, 2 ounces (or a handful) of shaved parmesan, one large egg, two cloves of garlic, parsley, sea salt, ground black pepper, garlic powder, basil, butter, and olive oil. Boil water in a large pot. Add a shot of olive oil and three shakes of sea salt to the water to prevent the pasta from sticking. You don't need to use large or colossal shrimp for your lasagna because it'll all get chopped up anyway. Wash the shrimp to remove any remaining loose shells and ice. Take half of the shrimp, coursely chop it in a blender or by hand, and set it aside. Take the remaining shrimp and all of the imitation crab and blend it to a finely minced mixture. Sauté it for a minute in butter and olive oil. Mix in a dash of ground black pepper and a couple of dashes of garlic powder. This is the seafood mousse. Now you have two textures of shrimp in your lasagna! Finely chop the baby spinach. Mix the ricotta, spinach, and egg in a mixing bowl. Drain the canned tomatoes of excess liquid and remove the basil leaves if you wish. Lasagna should always be prepared with lots of love and generous portions of whatever foods you use. It should be a relaxing event, not something to stress over. I prepared all of my layers as shown in the following list from bottom to top. In my previous lasagnas, I always avoided putting the main meat ingredient on top of the top pasta layer, but I did so this time with great success. Credit for the seafood lasagna idea goes to Kevin Lynch and credit for the "meat on top" idea goes to Ree Drummond. I've noticed that most lasagna recipes on the Internet have just two or three pasta layers. I grew up in an Italian neighborhood where lasagna was made nice and thick, so I'm used to at least four pasta layers. If you want a much thicker lasagna and don't want to make a huge batch of it all at once, get the Giada de Laurentis ceramic loaf pans. You'll have to trim your lasagna to fit the pans. Each pan makes four large servings. Top it with parsley to garnish.
Place the loaf pans in a roasting pan lined with aluminum foil. Cover each loaf pan with aluminum foil and bake in an oven at 350 degrees F for 30 minutes. Remove the foil and sprinkle shaved parmesan on top. That's your sixteenth layer. Be careful not to mess up your parsley garnish! Bake uncovered for 15 more minutes. Your lasagna will have absolutely gorgeous layers of red, yellow, and green. Best of all, it tastes great, too. The next time I'll try sautéeing my seafood mousse in white wine. That should make it even better. With three successful lasagnas made using my knowledge as a foodie, I feel confident I can make any kind of lasagna now. Created Febuary 2012.
Clare's "Veggirific" Lasagna I created an incredible fifteen-layer veggie lasagna, but made a stupid boo boo by forgetting to use my ricotta-spinach blend until last minute, so I made that my top layer. It still tasted great, but my lasagna would've held together better if the ricotta-spinach were inside. My veggie blend included eggplant, tomatoes, mushrooms, bell peppers, Cubanelle peppers, onions, garlic, basil, and oregano all diced and slow cooked in olive oil. I used the Barilla curly lasagna pasta, the kind you boil in a little salt and olive oil to keep the pasta sheets from sticking together. Baking was a 50 minute affair, 25 covered with foil followed by 25 without. Next time I'll get the layers right. I gave a piece to my mother-in-law. My ex said, "Oh yeah! I forgot to tell you she loved it. So did my dad! I didn't think he would eat it." My mother-in-law returned my Tupperware container with a serving of her delicious ziti with homemade meatballs. Created March 2012. Clare's Brooklyn Deli Tuna Salad When I left Brooklyn, I noticed that everyone was eating some alien form of tuna salad that had nothing more than tuna, celery, and mayonnaise in it. Aghast at that fact, I always created my own deli tuna salad whenever I felt the yearning for the real deal. The tuna salad I grew up with is more like an egg salad with tuna in it. Tuna and eggs taste great together! Get the following ingredients to make my delicious deli tuna salad: one can of your favorite tuna Coarsely chop the tuna, eggs, celery, and onion and put into a salad bowl. Add mayonnaise and seasonings and stir mixture with a spoon. How much of each is enough? Two shakes each of Old Bay, sat, and pepper is enough. How much mayonnaise you use depends on how wet you like your tuna salad. I don't think you can make a tuna salad too wet because once it's on bread, the bread absorbs the wetness and you don't have to coat your bread with mayonnaise. I like lettuce and red heirloom tomatoes in my sandwiches. Created Febuary 1991.
|
 Clare's Lasagna
  Most people who don't really know how to cook just use their senses of sight and smell to guide them, but cooking is really about using all five senses concurrently. I've become attuned to smells and have developed an instinct for how much spice to use. I could listen to how something was cooking and could tell if something was prepared to my liking just by the way it bubbles, sizzled, or crackled. I could feel the warmth of the food against my face while I was preparing it. If any of these five senses are faulty, your dish will end up mediocre at best. In a way, cooking is like art. You mold and shape something with your hands and you put your own signature on it.
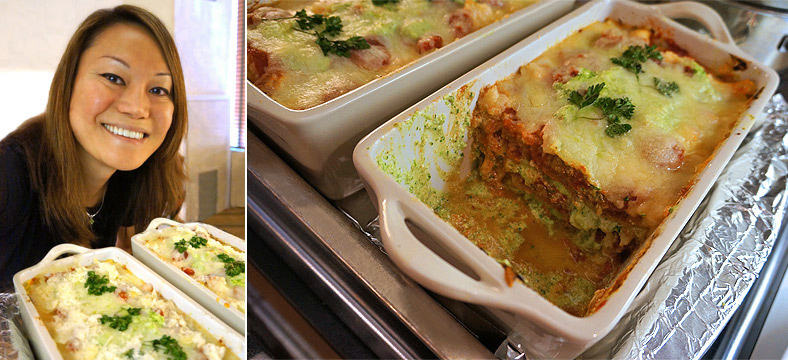


Clare's Kitchari
1 cup basmati rice
1/2 cup mung dal
(3 teaspoons kitchari five-spice mix) or (5 tablespoons of your favorite spaghetti sauce if you don't like the kitchari five-spice mix)
2 tablespoons ghee
6 cups water
2 cups chopped tomatoes, red bell pepper, zucchini, carrots, onions
1 tablespoon salt
1 tablespoon pepper
1. Wash the rice and mung dal and soak overnight. Drain soak water. Extract as many green mung dal casings as possible.
2.
In a medium saucepan warm the ghee. Add the kitchari spice mixture and sauté for 2 minutes (omit this step if you're using spaghetti sauce).
3.
Add rice and mung beans and sauté for 2 minutes.
4. Add 6 cups of water and bring to a boil. Once the kitchari has come to a boil reduce the heat to medium-low. Add carrots and zucchini (and spaghetti sauce, if using). Add salt and pepper. Stir. Cover and cook until tender (approximately 45 minutes). Add the remaining vegetables 17 minutes into the cooking process. Add more water if needed. Typically, kitchari is the consistency of a vegetable stew as opposed to a broth or paste.
Makes 6 servings.
Created June 2014. Original recipe here.
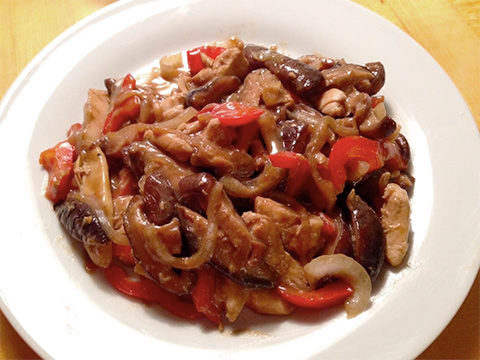
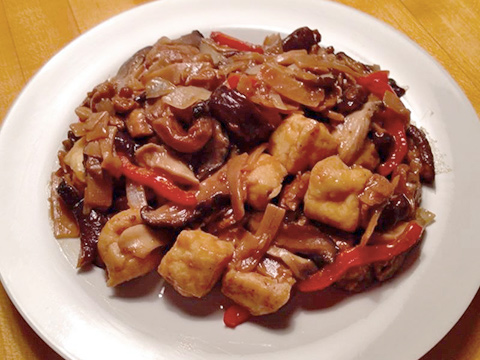
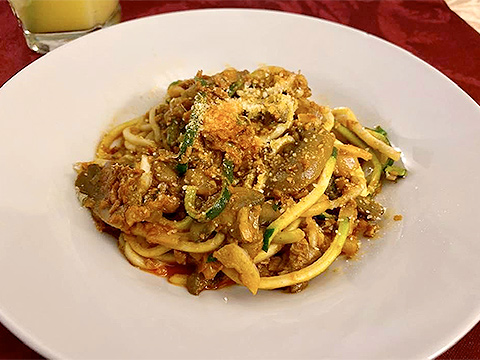
Clare's Vegan Squash Spaghetti Trader Joe's Soy Chorizo is a top-rated vegan chorizo sausage that is loaded with flavor. The next time you find yourself in a Trader Joe's, purchase these items for this quick stir-fry: 8 ounces Spaghetti Style Zucchini Noodles 1. Finely chop and dice the onions and garlic. Created February 2020. |
|
Clare's "Rib-It" Ribs
 Once upon a time, there was a little chain of restaurants in Philadelphia called "Rib-It" where you could get fantastic, affordably priced meals of your choice of five different rib meats. I've dined at three of their five locations right in the heart of Philadelphia. Every time I walked by their restaurants, I couldn't help but smile at how clever their logo was of a frog sitting with a rack of ribs on his plate looking like he was suffering from the itis. I have such fond memories of their Tuesday all-you-can-eat specials. I once devoured three racks of lamb ribs in one sitting! I must've looked exactly like that frog, no doubt. As a tribute to my once favorite rib restaurant, here is my spice rub and rib recipe. Use the finest quality ribs you can buy, coat them with a thick layer of spice rub, let the rub soak into the ribs for ten minutes, cover in two layers of aluminum foil, set on a rack on top of a sheet pan, and bake the ribs in the oven for 3.5 hours at 275 degrees. You won't even need rib sauce, because they're finger lickin' good!
Created March 2020.
|
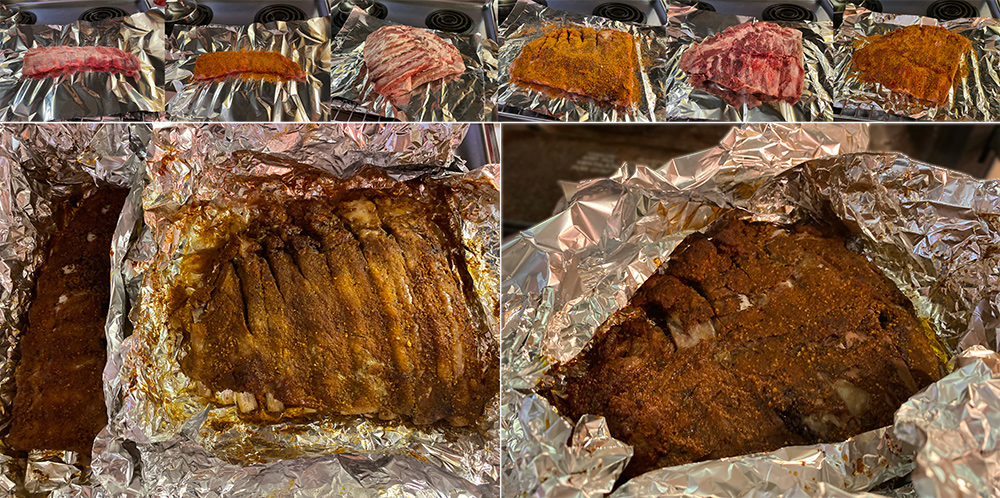
Baby Back and Spare Ribs
Clare's Philly Cheesesteak Rolls
1 envelope active dry yeast
4 tsp sugar
3 cups all purpose flour + a little more for kneading
1 1/2 tsp salt
1 1/3 cups water, lukewarm
Preparing the Rolls
1. In a small bowl or measuring cup, dissolve 1 tsp sugar in 1/3 cup of the lukewarm water.
2. Sprinkle the yeast over the water and let stand for 10-15 minutes until the yeast activates and becomes foamy.
3. Meanwhile combine the flour, 3 tsp sugar and salt in the bowl of a stand mixer with the dough hook attached.
4. Add the proofed yeast and the remaining 1 cup lukewarm water.
5.
Mix on low speed until the dough has been kneaded for at least 5 minutes before adding the olive oil and letting it work its way into the dough.
6. Turn the dough out onto a very lightly floured bread board or counter top.
7. Knead the dough by hand for at least 5 minutes after it comes out of the stand mixer, remembering to use as little flour as possible.
8.
Use the heel of your hand to stretch the dough across the kneading surface in a sort of smearing action, then fold the dough back over itself, turn it around a half turn, and do the same again. Keep repeating this action for at least 10 minutes to develop good gluten in the dough. The dough should appear relatively smooth but still a little sticky to the touch.
9.
Lightly oil a large bowl with olive oil, place the dough inside, cover it with plastic wrap, and let it sit in a warm place for at least an hour until the dough doubles in size. 2 tbsp olive oil, plus a little more to brush on the rolls.
Forming the Rolls
1. Again on a lightly floured surface, knead the dough back into a ball and cut into 6 equal pieces.
2.
Form the dough pieces into about 6 inch lengths and place them a couple of inches apart on a parchment paper lined cookie sheet. You can dust the parchment with yellow cornmeal if you like but it shouldn't stick to the parchment paper in any case.
3. Very lightly brush the formed rolls with olive oil. Dust the tops with a little cornmeal too if you like.
4.
Drape the cookie sheet loosely with plastic wrap and let the rolls rise in a warm place for at least another hour or so until they at least double in size. You don't want to rush the dough rising at this stage or else your rolls will be too dense. Do not stretch or reshape the dough at this point!
5.
Preheat the oven to 425 degrees F. The oven must be fully preheated. Place a small tray of boiling water in the back corner of the oven. I use an aluminum pie plate. This causes humidity inside the oven, which helps the bread fully rise before forming a crust.
6.
Using a very sharp knife or razor blade, quickly but gently cut a 1/4 inch deep slit down the centre line of the rolls before immediately popping the tray into the hot oven.
7.
Bake for 9 minutes before reducing the heat to 400 degrees F and baking for an additional 17-18 minutes until the rolls are an even golden brown. They should sound hollow when tapped with your finger.
8.
Let them cool on a wire rack before serving as fresh as possible with cooked steak and cheese inside.
Be careful not to add a lot of flour in the kneading process. You still want this to be a little bit of a sticky dough right through to the end stages. This ensures that the final inside texture of the roll is soft with the gluten well developed and not a denser texture with tight bubbles.
Knead the dough by hand for 5 minutes, even after it comes out of the stand mixer, remembering to use as little flour as possible. Use the heel of your hand to stretch the dough across the kneading surface in a sort of smearing action, then fold the dough back over itself, turn it around and do the same again. Keep repeating this action for at least five minutes to develop good gluten in the dough.
Never add the olive oil with the rest of the ingredients; this will inhibit production of gluten and form a less elastic dough. Add the oil only after the gluten strands have already begun to form within the dough.
Clare's Beyond Burger Cooking Method
 The package tells you to cook the Beyond Burger Plant-Based Patties on medium-high heat for 4 minutes on each side, but you can't treat these patties exactly like meat. I prefer to cook my patties on medium heat for 4 minutes on each side and then on medium-high heat for an additional one minute on each side for crispiness and to lock and seal in the juices and flavor. I use a tablespoon or two of olive oil in my frying pan and gently rotate my burger to get better evenness in cooking and to prevent the patty from sticking to the pan. I find that the supporting ingredients you use are every bit as important as the preparation of the patties. For this reason, the burger bun should be soft and pillowy versus the kaiser rolls used on larger burgers. If you use Beyond Beef to make your own patties, you can use kaiser rolls, but a good choice might be a brioche bun or even BallPark burger buns for the preformed Beyond Burger Patties. I like to include an extra piece of lettuce in my Beyond burgers because it gives my burger a little more crunch and hides the non-meatiness of the patties a little better. A slice of a nice, sizeable beefsteak tomato is good, but if a tomato is not available, I substitute baby bella mushrooms, pan-fried with my burger during the last two minutes when I turn up the heat. I always include onions in my burger, sliced thin and halved, and also pan fry them with my burger. I coat the bottom half of the bun with a thin layer of mayo and the top half with a thin layer of ketchup. I stack the lettuce leaves on top of the bottom half of the bun, add a slice of cheese, and place the heated burger patty on top of the cheese, allowing the cheese to melt. I typically use provolone when I have mushrooms or pepper jack when I have tomato. I place the onions, and mushrooms, if any, on top of the patty and top everything with the top half of the bun. When all is said and done, you will have a restaurant quality Beyond Burger that some places will charge $14.99 for.
All images and work herein © 2007-2026 Clare Din. No reproduction without permission. All rights reserved.